Adding code blocks to the blog
Testing highlight.js
Date:- nodejavascriptbackendhighlight.js
After working for a while and experimenting with different options, I finally added support to the blog for inserting code blocks.
Before adding this functionality, it was necessary to consider two main points:
- It must work on the backend.
- It must be simple enough to be mixed with our templating system. 1
Luckily, the highlight.js library covers the requirement for backend functionality and simplicity, as it only consists of a parser that takes our code and, depending on the type of variable, adds an HTML tag with a CSS class that allows us to customize the colors.
Another advantage is that it can be easily installed, although if we want
to use the default styles, we need to extract them from their
directory among the Node modules (node_modules/highlight.js/styles).
From here we can copy them to serve them from our server,
or insert them along with the templates.
In my case, to combine it, I use a couple of functions that take the raw code, pass it to highlight to add its tags, we then just add a couple of extra tags for our convenience, and some more custom CSS.
javascript
import hljs from 'highlight.js';
function codeTag(inCode,language='javascript'){
return "<code class='is-monospaced hljs'>"
+( hljs.highlight( inCode.trim(), { language } ).value)
+'</code>';
}
function codeBlock( language='xml', inCode='') {
return `<pre>
<p>${language}</p>
${ codeTag(inCode, language) }
</pre>`
}Having it this way allows us to include code in the page:
javascript
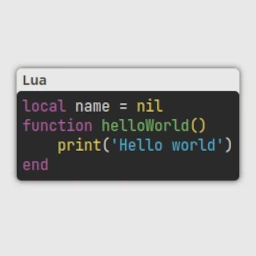
${ codeBlock('lua',`
local name = nil
function helloWorld()
print('Hello world in lua ')
end
`)}lua
local name = nil
function helloWorld()
print('Hello world in lua ')
endAnd also to introduce lines of code along with the text:
html
<p>Which looks like this: ${ codeTag(`helloWorld()`)}</p>Which looks like this: helloWorld()
With this, the blog is better prepared to show code examples and technical explanations. 🙂